Showing posts with label illustrator tutorial. Show all posts

Tuesday, June 22, 2021

How to Maintain Illustrator Vector Artwork In Photoshop Editing Process

As a logo designer I often use Adobe Illustrator instead of Adobe Photoshop to work on my logo projects. But sometimes I need to add graphic effect on Photoshop, for instance if I need to put perfect realistic gold effect on the text part of a logo, yet I also need to make the shapes resizable. I don't say that Adobe Illustrator won't allow me to add gold effect, but Photoshop has more enhanced tools to make realistic gold effect. Then in this case, to continue the editing process, to use Photoshop is the best option. 

But how you would be sure if you'll get your Illustrator vector shapes back after the Photoshop editing stage?

Here's the tutorial steps of how to maintain the Illustrator vector shapes: 

  1. Create the vector shapes on Illustrator.
  2. Copy the Illustrator vector shape and paste each vector shape as Photoshop shape layer on Photoshop then add some graphic effect.
  3. Save as EPS file on Photoshop and tick the include vector format option.
  4. Open the EPS file on Illustrator then save as AI file.
  5. Check if you get vector layers in the EPS file.

TIPS: 

Remember to select Paste as Shape Layer not as Smart Object, Pixels or Path when you paste Illustrator vector shape to Photoshop. This technique will maintain the shapes as vector if you plan to use the graphic in bigger size.  
As the additional information that I'd like to put weight is that Photoshop gives you four options to copy a vector shape from Illustrator to Photoshop. Here's a brief explanation of each option:

Paste Artwork Options in Photoshop 

  1. Paste as Smart Objects 
    This is a good choice when you need to copy an entire design, and it’s your best option if you might need to modify the source artwork later in Illustrator. 
  2. Paste as Pixels 
    Pasting in the layer as Pixels will allow Photoshop to treat it just like the artwork was created inside of Photoshop. The downside is that Warps and Transforms will not preserve the quality of the original artwork. They work just like they would a standard art layer in Photoshop. 
  3. Paste as Path
    This option will paste only the vector path for the shape copied. The artwork can then be edited using the Path tools in Photoshop. 
  4. Paste as Shape Layer 
    As with Paste as Path, this option also works best for individual shapes. A Shape Layer is essentially an editable Vector Mask over a field of a specified color. 


 RELATED ARTICLE RESOURCES:

Tuesday, March 23, 2021

Converting Text to Single Stroke in Illustrator

To create outlines from text in Illustrator is the most common things to do when you deliver ready to print vector file. But what about to convert text to a single working stroke in Adobe Illustrator?

Recently I did a little experiment in LottieFile to animate an SVG file using a particular animation style which only animate the line paths or strokes of text and illustration element. It will not working if I just create outlines from a text, so here's a video tutorial that will explain of how to turn fonts or text into single line paths in Illustrator CC. 


There are few other techniques explained in an old forum thread in Graphic Design Stack Exchange of how to convert text to single stroke in Illustrator, but I think a few of them still relevant and worth to try.

Last thing, here's the final result of my experiment:

The decorative lineart frame is part of my design item on CreativeMarket: 25 Multipurpose Squary Lineart Font used: Grand Hotel

Thursday, July 26, 2018

Create Dust Gold Effect in Illustrator

Do you know that you can add dust texture for a shape that has gold gradient? 
Our client requested to add this dusty gold effect in a set of decorative element. So here’s how we do it:

Prepare the shape

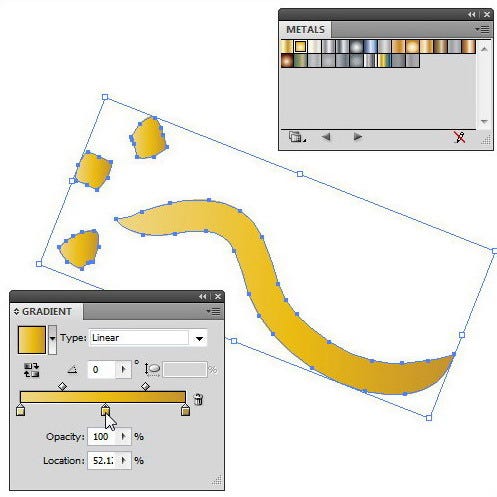
Add any shape that you have. We quick draw a line and several dots using Paintbrush tool then Expand Appearance it to convert the line to shape.

Draw a shape

Add gold gradient

Open your swatch library: Open Swatch Library > Gradients > Metals.
Here we use the minimal gold linear type gradient, after we altered a bit the default radial gold gradient effect in Adobe Illustrator.


Apply gold gradient to the shape

Apply texture effect

Go to Effect > Texture > Grain and then experiment with the settings

Dusty texture gold effect from ‘Grain’ texture


Then you will have ‘Grain’ texture applied on your gold shape. It’s fairly easy!
You can add this effect to the Graphic Style and save it in Graphic Style Library for future usage.
This dusty texture gold effect can also directly be applied to a line using Paintbrush or Pencil tool.

Friday, October 12, 2012

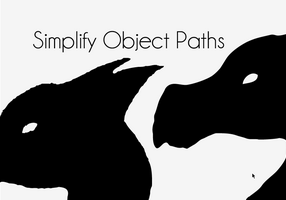
Simplify Paths in Illustrator

Live Trace in Illustrator can have complex settings. The traced object often gets lots of anchor points and the jagged edges even you thought you have did your best to use the Tracing Preset. Here's a quick tips that I want to share with you. Read More


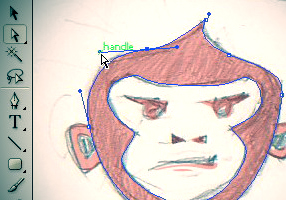
After your vector object is traced, just go to Object > Path > Simplify and set the values of the Curve Precision and Angle Threshold.


You can also compare the simplified vector object with the original one by clicking the Show Original checkbox in Options. You'll see the outline of the original object vector surrounding or in linear layer with the simplified object vector, just to make you easier to further edit some of the anchor paths.  
Click to get bigger preview


Tuesday, January 31, 2012

Working with Guide Tool in Illustrator

You must be familiar with Guide Tool in Illustrator. But have you consider yourself using this feature optimally to speed up productivity, to help organize and accurate place your illustrations, and be more precise when creating artwork in Illustrator?

Here are some Illustrator Tutorials to better understand the function of Guide Tool, its customization and to learn what kind of things that you can actually make with the help of Guide Tool.

Feel free to post a comment below if you have your own quick tips to work with Guides in Illustrator, or if you want to share other tutorial resources with everyone!

Read More

Wednesday, September 7, 2011

Create a Shutter Shape in Illustrator

In Illustrator CS5, there is a new tool named Shape Builder tool. It helps you to get rid a whole lot of unnecessary vector parts by holding down the Option/Alt key and hover over the parts that needs to be removed.

Veerle Pieters, a graphic and web designer living in Belgium, wrote a step by step Illustrator tutorial to create a shutter shape and will show you how easy implementing this new Shape Builder tool.

Visit the Tutorial


Read More

Sunday, August 28, 2011

How to Make Two Perfect Points Alignment in Illustrator

When you combine two vector shapes in Illustrator, sometimes the points of the shapes are not perfectly aligned. This will make your combined shapes look a bit bent or uneven at the perimeter.
This useful tutorial will finally reveal the secret to create clean curve using 'Path Average' feature in Illustrator.

Today's Illustrator quick tip was written by Jay Hilgert, a graphic and web designer, font designer, software developer (Brush Pilot™), and the founder of BittBox.

Visit the Tutorial


Related Post:

Sunday, July 11, 2010

How to Vectorize a Sketch with Transparent Layer Technique in Illustrator


There are many kind of techniques to vectorize a sketch. For complex illustration, you can use tracing technique, or live tracing which are quite complicated in process. You'd probably have to spend longer time in inking your illustration before you scan it and continue the digital process. If your sketched design is simple, symmetrical and appears with enormous geometrical shapes, you can just rely on vector shapes tool (Rectangle Tool, Ellipse Tool, etc.) to get it done.

In this this quick tip tutorial, I'll show you how to vectorize shapes based on a sketch with the help of layer opacity in Illustrator. I think it would work for any complex illustration, but today's tutorial is a bit different. This is because vectorizing always take intensive uses of Pen Tool so it's going to be better if  you see a short visual demonstration in a video for that. To get better view, I suggest you to see the videos tutorial in full screen mode.

Read More

Since I design logos quite often, this quick technique helps me a lot and I guess everyone can use it without hassle. Start to create new layer after you lock your sketch graphic layer. Then start to add vector shape with Ellipse or Rectangle Tool. Adjust the layer opacity to get transparent effect. Set it in your desired value, I'm convenient to have it in 15% layer opacity. In this way, you can freely drag the anchor's path handle with the reference of your locked layer sketch and have full visual control in this vectorizing process.


After you're done with one vector shape in its correlated layer, lock this layer and repeat the step for another part of the sketch that you wish to vectorize. Pathfinder Tool is handy enough to help you modify more than one vector shapes into single shape or any kinds of shapes that you wish to see.

Below is a quick demo that visually explains how to subtract two vector shapes area using 'Minus Front' pathfinder tool in Illustrator.


I hope you find this Illustrator tutorial useful and kindly share this thank you!

UPDATE:
The result from this quick vectorizing process is a new logo, which I call Apetive.


Related Post:


Thursday, July 1, 2010

Techniques to Create Cartoony Graphic Effect

No matter how you start it, either from raw sketch or a photo, creating a cartoon or comic illustration is always fun. Here are a short list compilation of various techniques to create it.


Read More

Tuesday, November 18, 2008

»» How to Create Icons in Illustrator - Part 2

1. Help Icon
You all know about this icon and many of us are used these things too. The main part is the glossy effect of the icon. Check it out....
2. XBox 360
It is very famous, I know many tried there level best to do it of your own. But it's such simple here try this one..
3. Folder Icon
We all are familiar with this one, but this is slightly different. Check it...
4. Translucent IM
This is one of the main notable thing, because it is that much special through the shape it is having.


Sunday, November 16, 2008

»» Illustrator Tutorials - Part 7

Are you got bored of some repeated photoshop, corel draw tutorials? Fine I just found out some cool Illustrator Tutorials, which will surely help the beginners to do better. Here check this out and make use of it...

1. Flower
Create stylish vector flower with Illustrator Blend tool.

2. Tracing photo
Full detailed tutorial on how to trace from a photo.

3. Adobe bridge icon
Want to know how this complex Adobe Bridge icon is made?

4. Pumpkin
Learn how to draw a Halloween pumpkin from scratch.

Featured Post

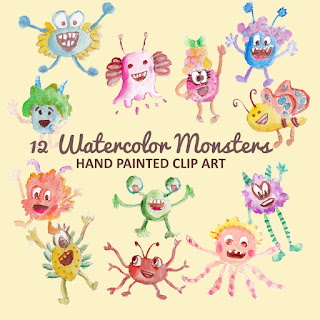
Monster Illustration Vectors that Work

Not all monsters are scary and we can apply them in a design composition or illustration. You may want to search bunch of new created monst...