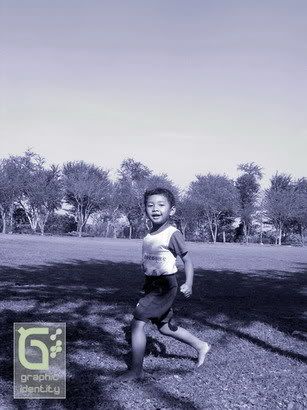
There are 5 easy ways to make your photo shot communicate visually.
1. Capture Angles

Your digital pocket camera has an advantage since you can move freely to capture photo model or subject to get certain angles. Instead of capturing at eye level (like everyone do), try extreme angle to get your best shot moment. Capture image using low angle, bird eye level, or side elevation. This technique will bring much better variation to your photo shots.
Close up photo can also become a good solution to capture photo subject using uncommon angle. Use flash light and activate continuous shot to avoid blurriness.
2. Digital Retouch
Red eye as a result of excessive flash light when you took picture in an indoor environment could be easily edited by Adobe Photoshop. You can use Patch Tool, and Clone Stamp Tool. Healing Brush is also common for removing unwanted spot marks, especially when you want to edit a close up face photo.
3. Use Filter

Filter in photo can bring certain expressive color mood. A filter changes the color balance of light and correct colors. Special uses in filters can be implemented for darkening blue skies, darkening an overcast sky, stressing texture of sand and snow, reducing haze and to get the right skin tones. In some extension, there are also special-effects filters such as: star filters, multiple-image filters, diffraction filters, and diffusion filters. Diffusion filters can be divided into fog filters, center-clear filters and motion filters. Experiment using filter on each of your photos, and see the different.
4. Use Silhouette Effect

Subjects can be further simplified by using a silhouette or the opposite of a silhouette which would be a bright form against a dark background. To make silhouette first requires a bright background. The sky is the most common bright background. A white wall, sun-reflecting water, a bonfire, and other bright sources work as well. Underexpose by 2 or 3 stops to darken the subject and make a silhouette out of it and helps when you are a photographing a highlight against a dark background. Suppression of detail through underexposure creates bold poster-like image.
5. Background and Subject Composition

There is no doubt at all, that background behind the subject influences the whole photo look. Bright skies, natural vegetation, landscape, or architectural background are common in photography. The most important thing is not to be overwhelmed in one frame. Pick the right background and imagine that it won't ruin the subject itself. What if your background is a crowded place and too much color combination in just one frame? The best way to create an eye catching subject in such scene is to filter your background or use center clear filters. Capture your photo subject in a close up shot and use wide depth of field.


No comments:
Post a Comment
If you like Graphic Identity's articles & our free design box, please drop your comment or subscribe Thank you :)
NOTE:
GraphicIdentity admin will always moderate all comments. We will not publish comments that include irrelevant links with targeted anchor text. Also it will be nice if you mention your name rather than to comment as an anonymous user.